Ab Megapost - The Top Calisthenic Ab Exercises
Part of the SoloStrength Body Weight Exercise Series
Introduction
Connecting the upper and lower body, we have the most sought-after muscle in terms of aesthetics: the Abs. They are perhaps the most universally appreciated yet most rarely seen muscles. Some have great ab development, but they don’t show. Others have poor development, but are thin enough to show. Some have neither. Here, we will teach you the exercises to develop this muscle to its fullest potential. Key word being develop. Remember, abs are built in the gym but revealed in the kitchen. A future article will be dedicated to revealing them.
So what makes up the abs? They are a series of muscles, the most well-known is the rectus abdominus. This is the central muscle running from the bottom of the sternum to the groin. This makes up the six pack that everyone thinks of when they think of washboard abs.
Flanking it on either side are the obliques, which are made up of 3 separate sheets of muscle: the external obliques, internal obliques, and transversus abdominis. Each muscle helps twist the body and lean side to side. They are also extremely important in bracing the core. There is a 5th muscle called the pyramidalis, which is present in ~80% of the population, and helps stabilize the abdominal wall.
So besides aesthetics, what are some other reasons to train them?
Improved posture. Your abs work with your back to support your upper body. Weak abs mean a weakness in the body’s ability to hold itself up. The result is a slouch, regardless if you are sitting or standing.
Reduced risk of injury. Just as your posture requires strong abs, so too do movements. A weak point in your abs can put stress on your back, either straining it or worse, herniating a disk.
Better balance and stability. A tight core stabilizes both the hips and the spine, leading to better balance and coordination.
Improved athletic ability. Your core is where a lot of power can either be generated or lost. Strong abs allow for efficient movements with your joints in proper alignment.
Prevention of anterior pelvic tilt. Also called lower cross syndrome - it is the result of weak abs and glutes, combined with tight quads and hip flexors. Strengthening the abs adds balance to those muscle groups, reducing the severity.
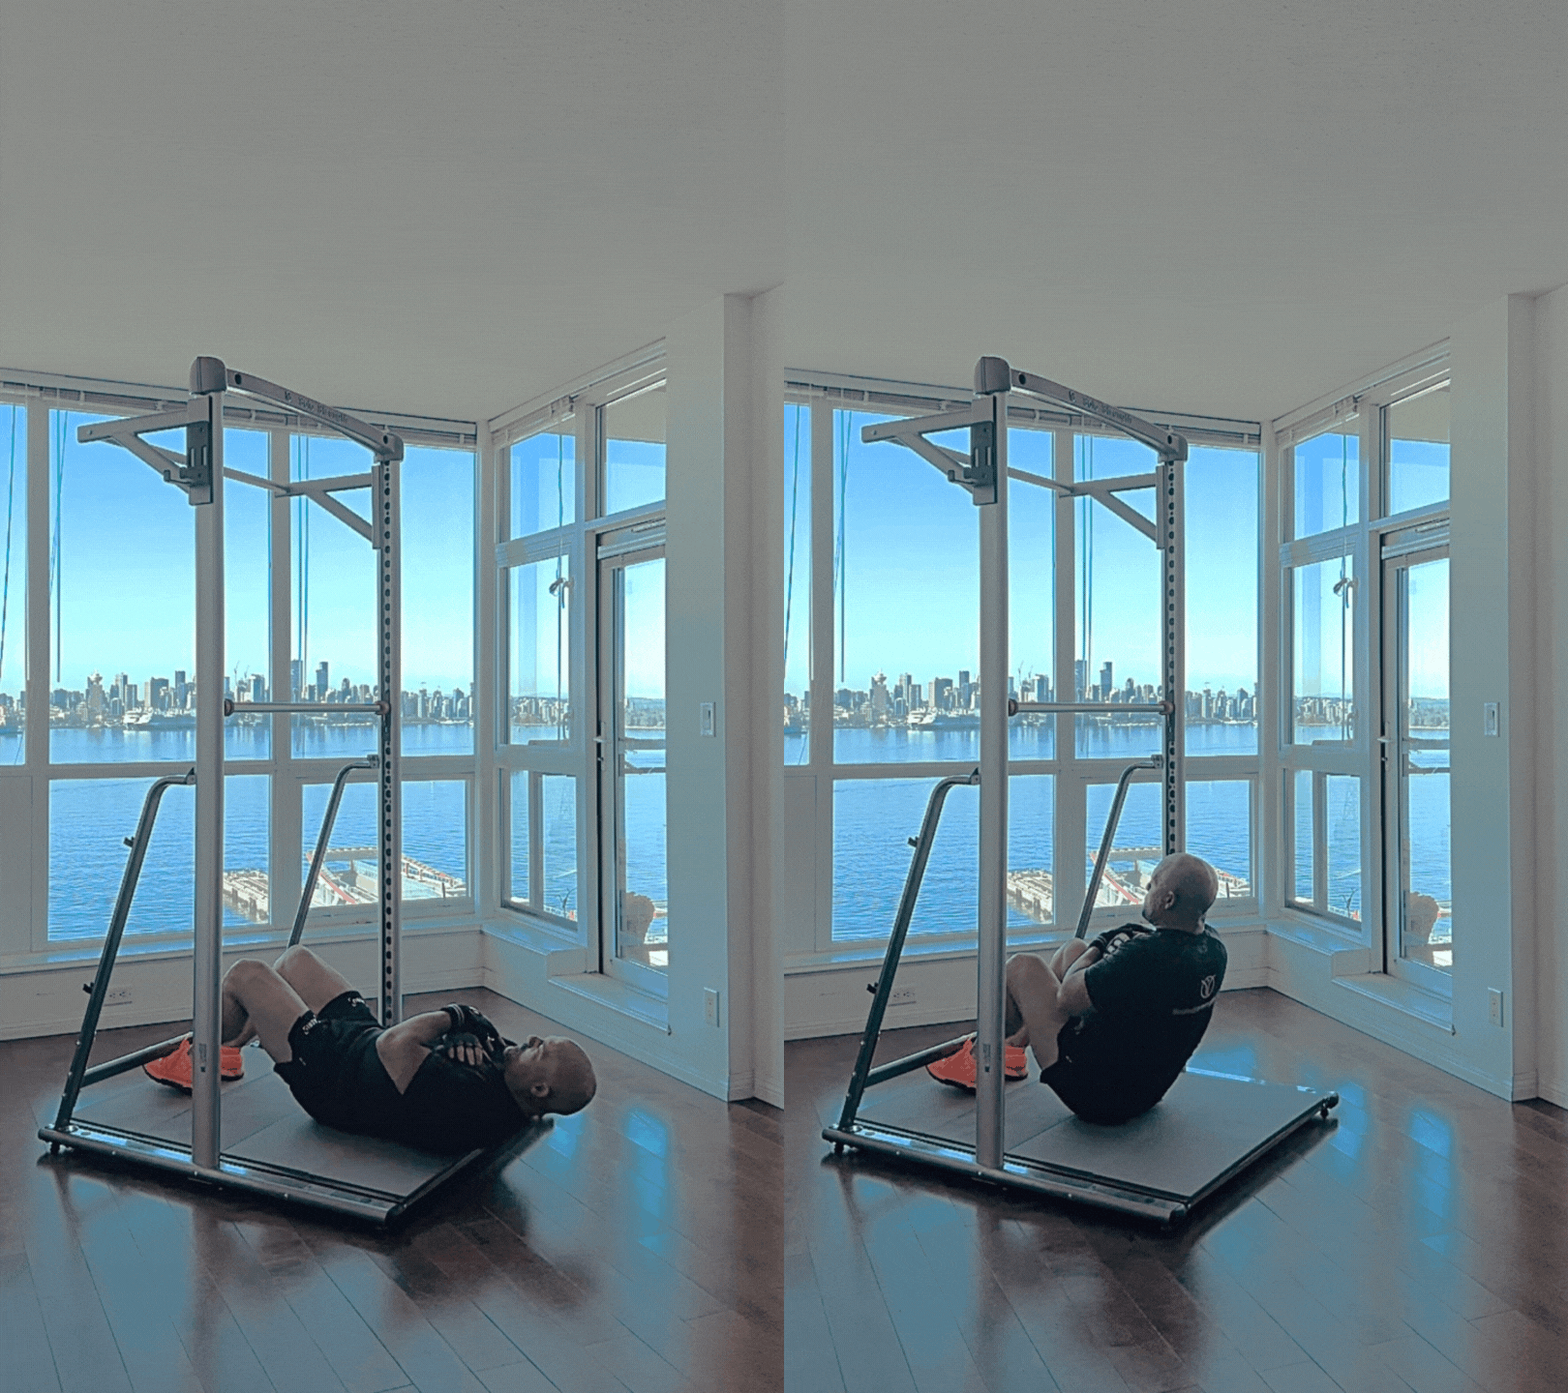
Crunches
How to do them:
Lay flat on the floor with your knees slightly bent.
Keep your abs tight.
Contract your abs so that your upper body lifts off the ground.
Then lower yourself slowly.
This will work all abdominal muscles, if performed correctly, but with a focus on the upper abdominals. You don’t need to bend at the hips and raise your body fully as in a sit-up. The goal here is to maintain tension in the abdominal muscles as long as possible. If you’re able to increase the difficulty, perform slower reps with a pause at the top.
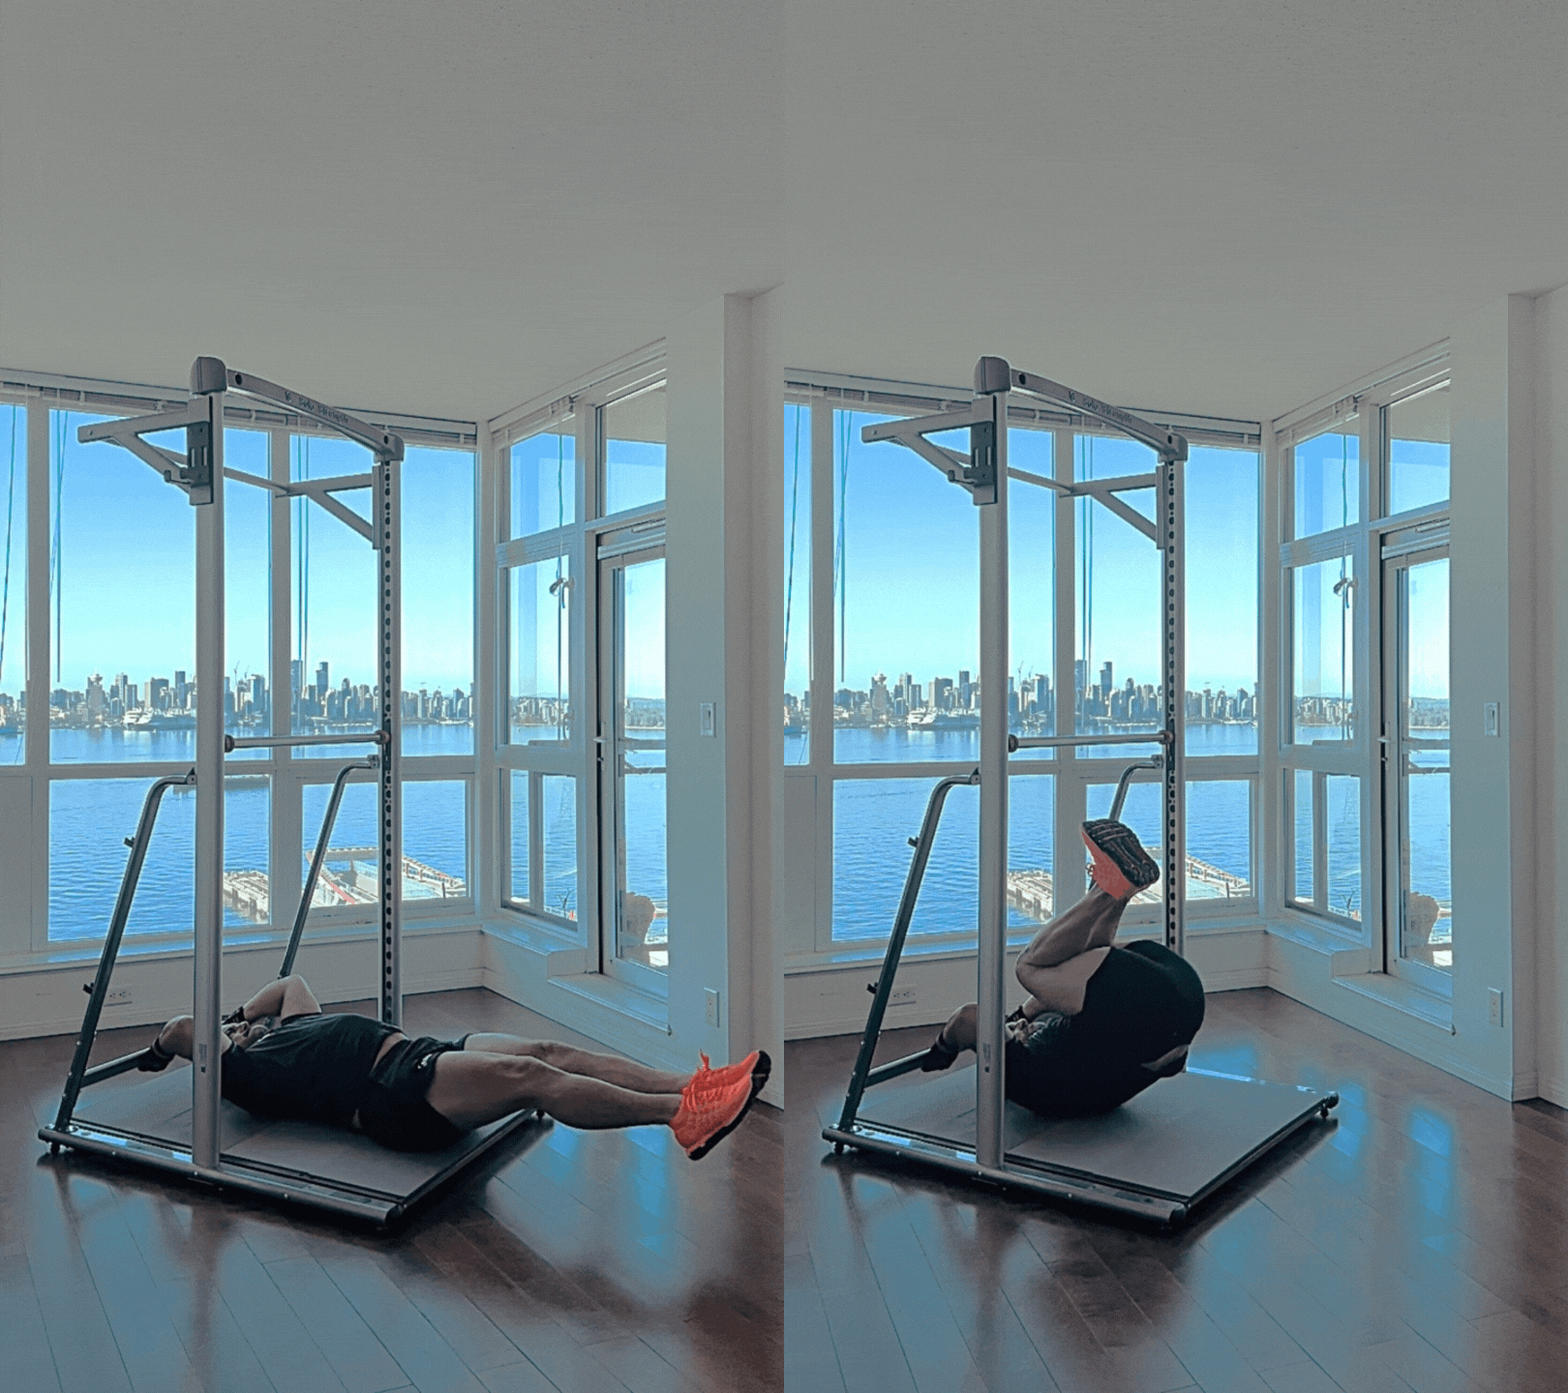
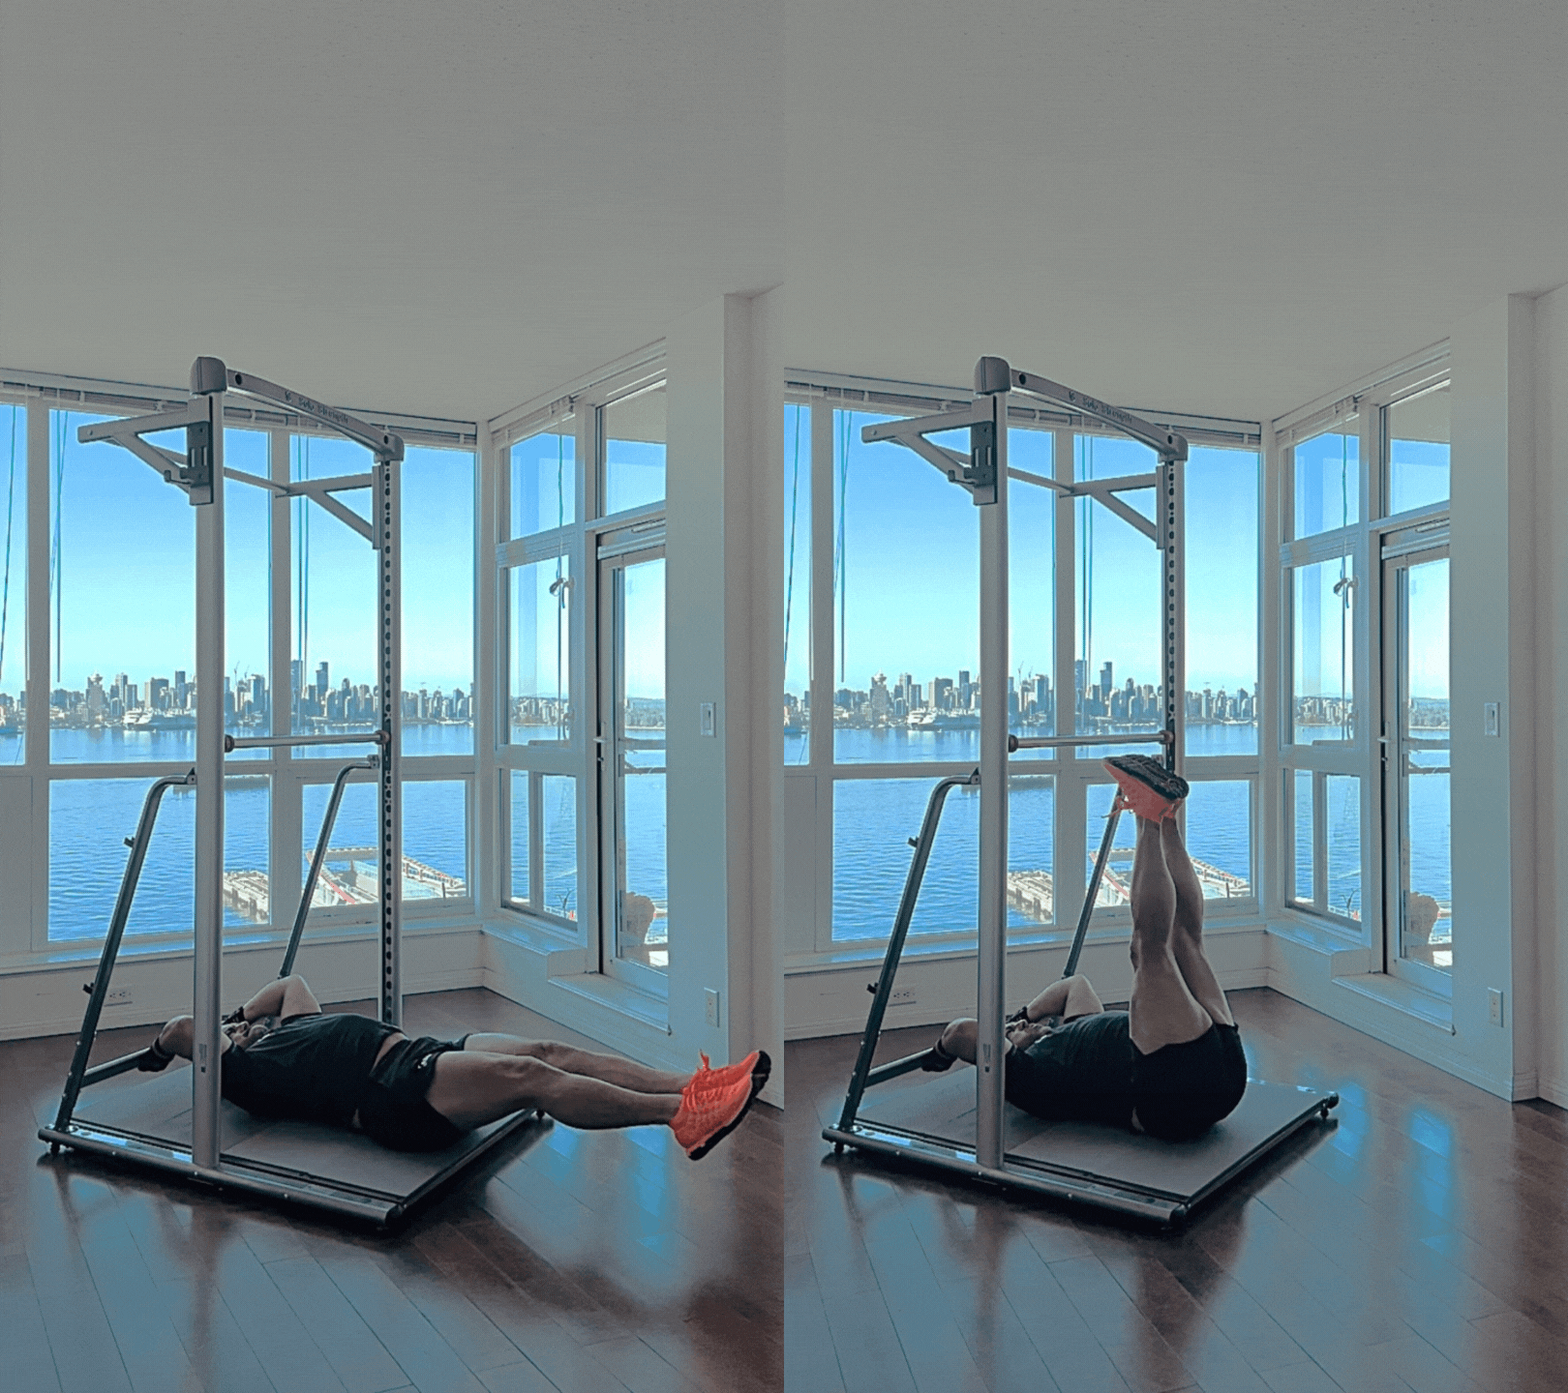
Reverse Crunches
How to do them:
Lay flat on the floor with your legs straight.
Keep your abs tight.
Bring your knees up to your chest, or as far as you can.
Relax and bring your legs back down, straightening your knees.
This exercise will work the lower abs and hip flexors.
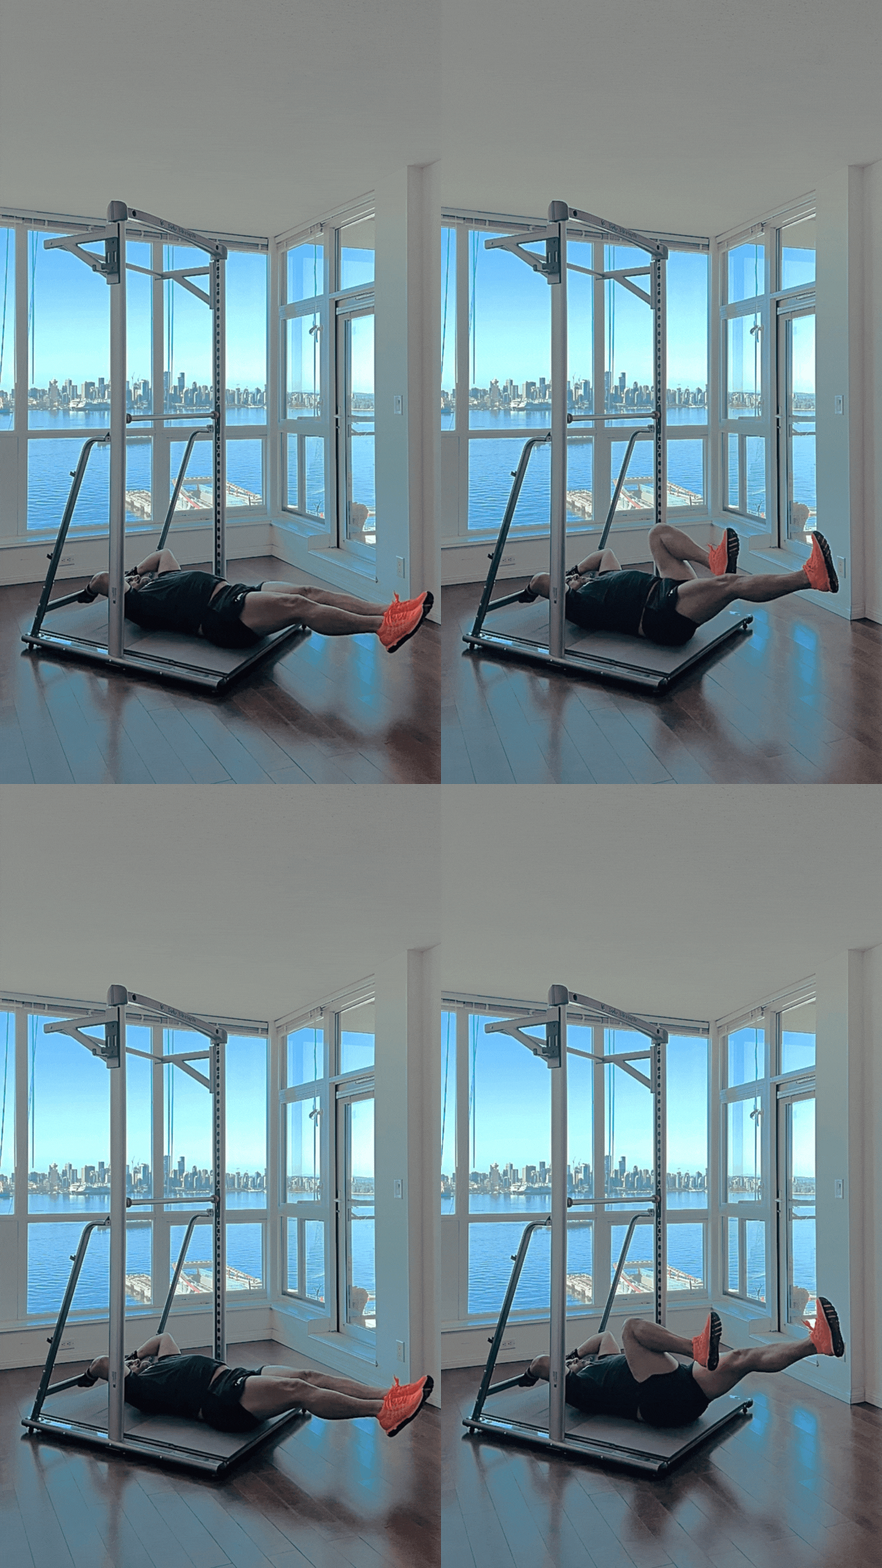
Alternating Knee Lifts
How to do them:
This is similar to the reverse crunch except only lifting one knee at a time.
Straight Leg Lifts
How to do them:
Lay flat on the floor with your legs straight.
Keep your abs tight and raise your legs, bending at the hips.
You should not bend your knees.
When your hips reach 90 degrees, or you reach as far as you can go, stop and lower them back down.
For a more difficult variant, try toe ups: bring your feet up to the bar and then back down. Even if flexible, you may need to lean back as you bring your feet up.
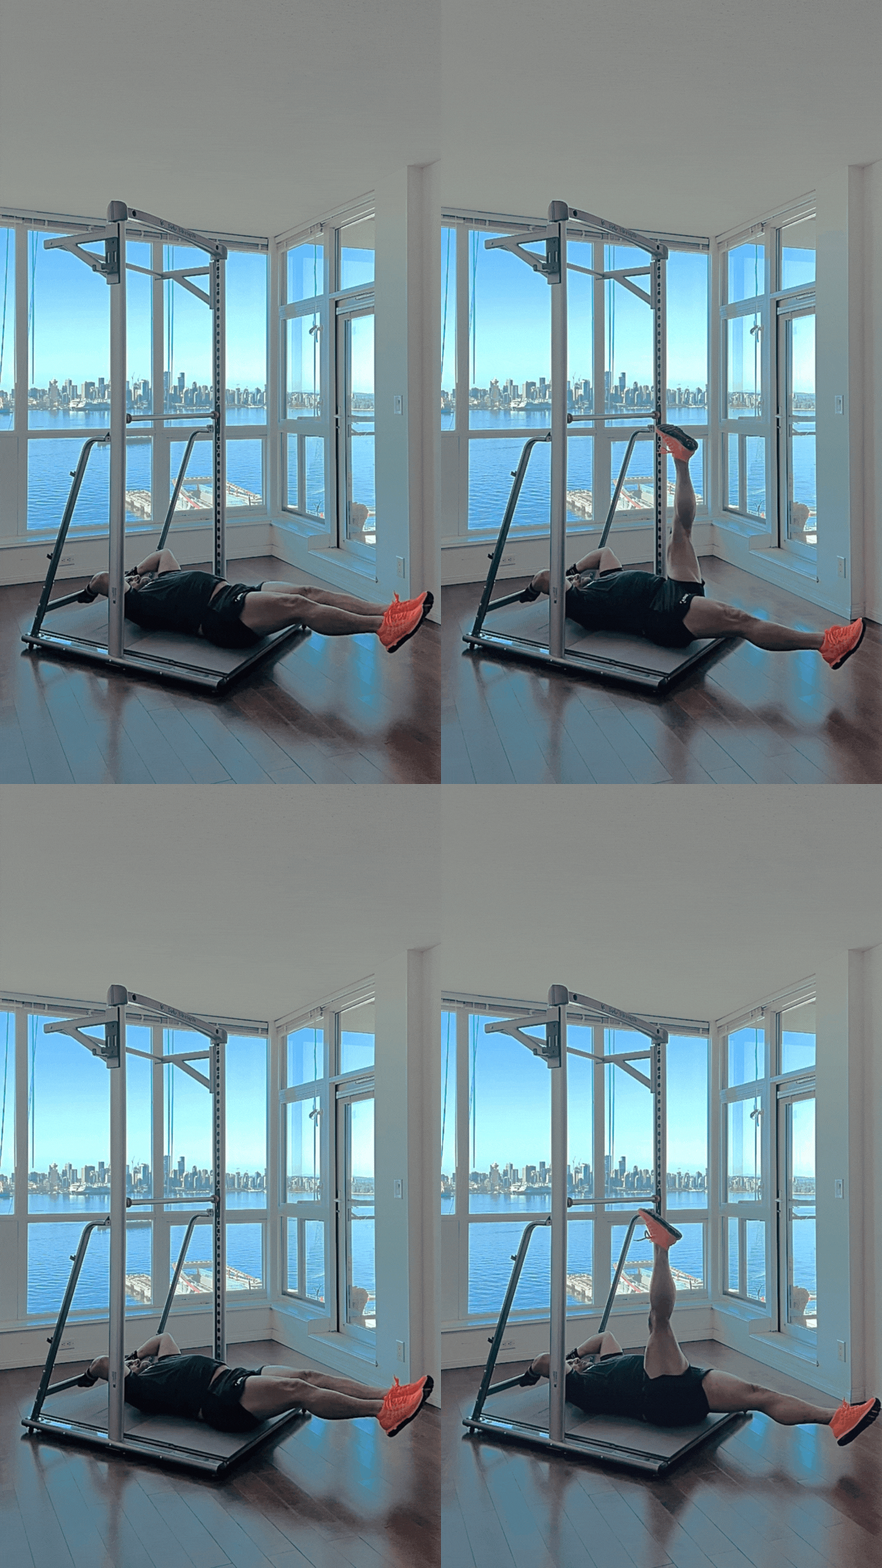
Alternating Leg Lifts
How to do them:
This is similar to the reverse leg lift except lifting only one leg at a time.
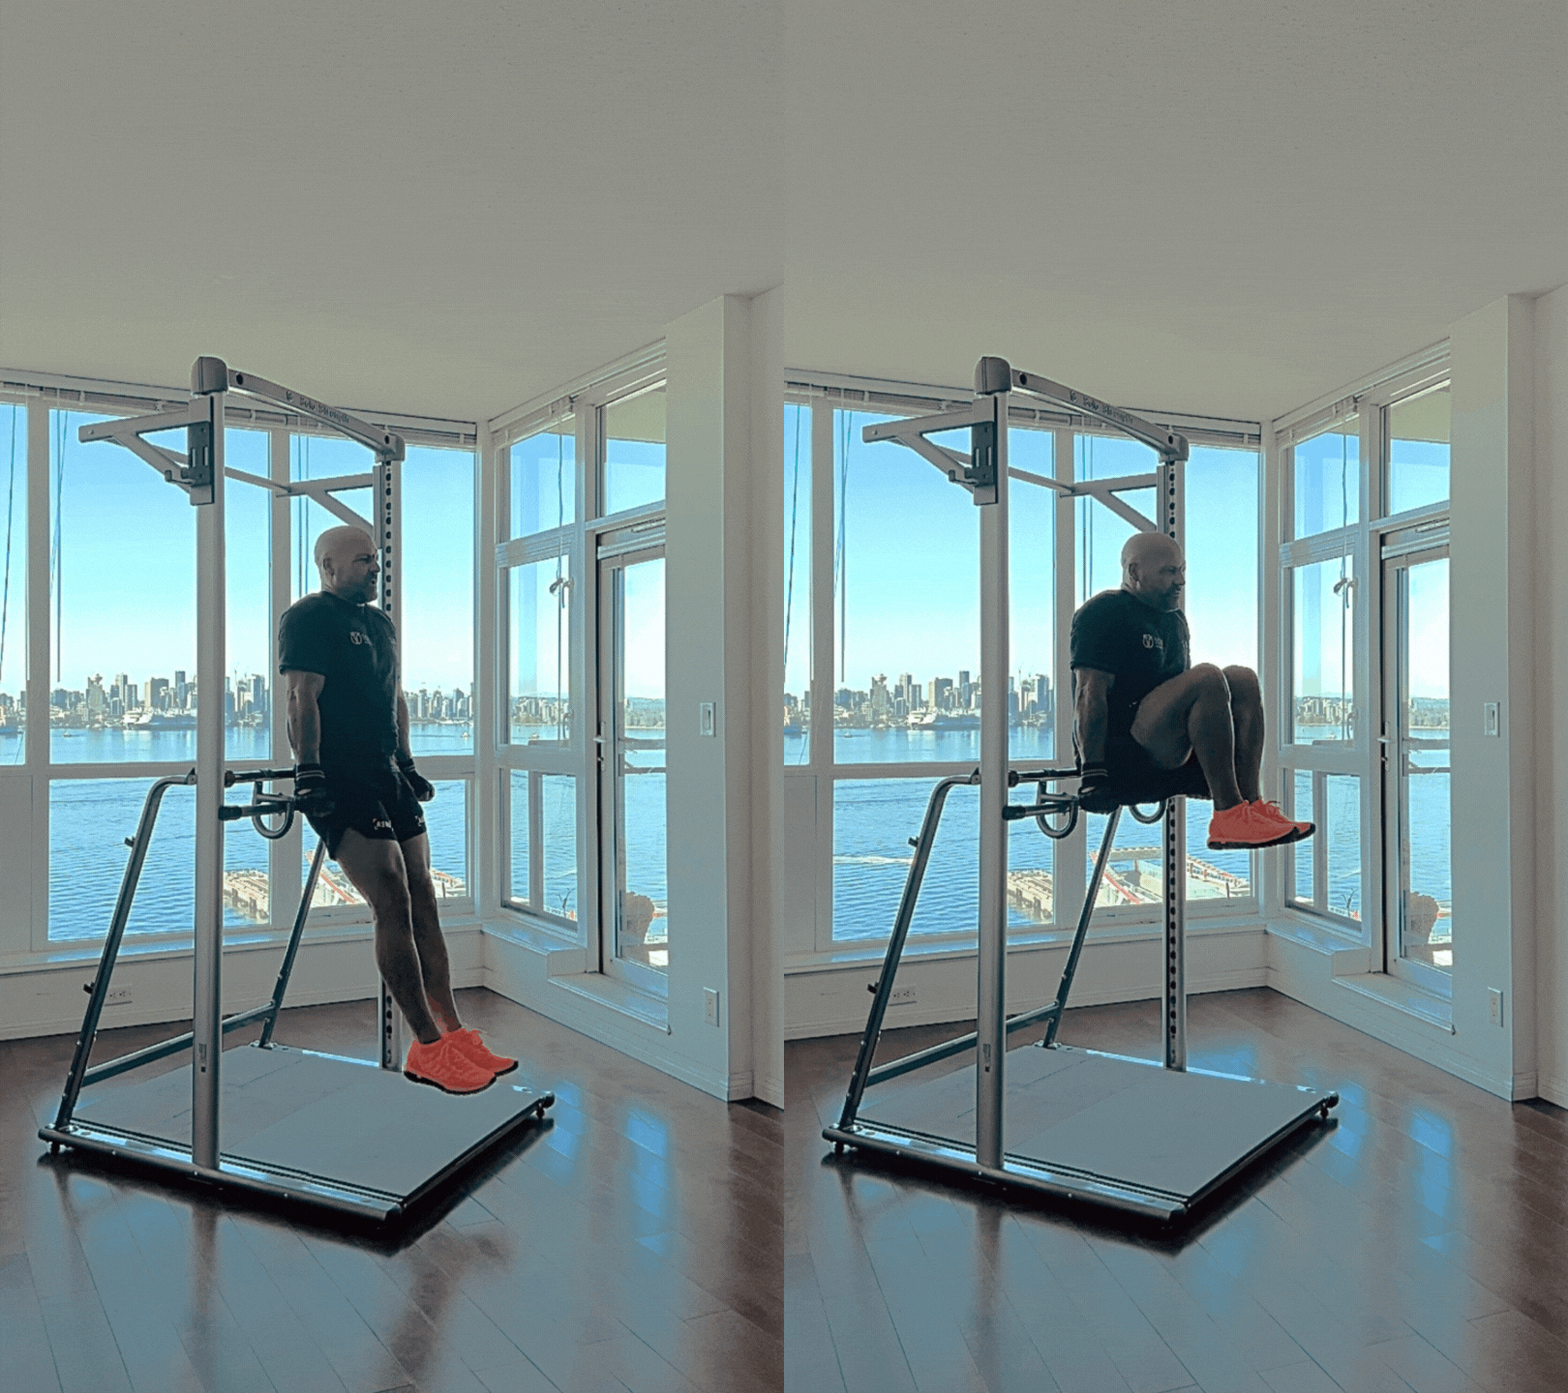
Knee Ups
How to do them:
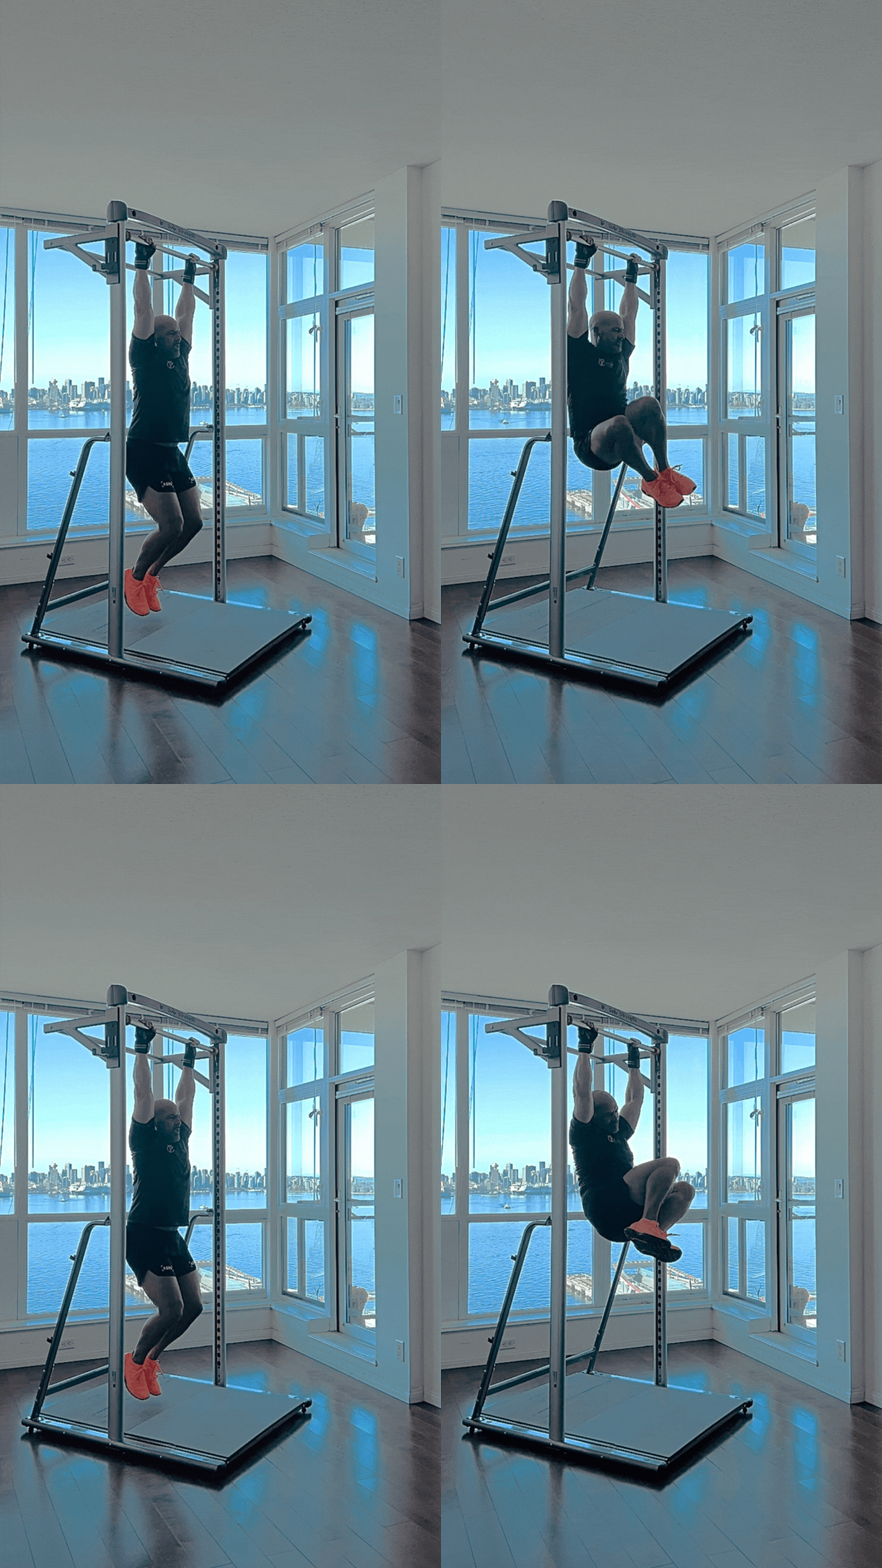
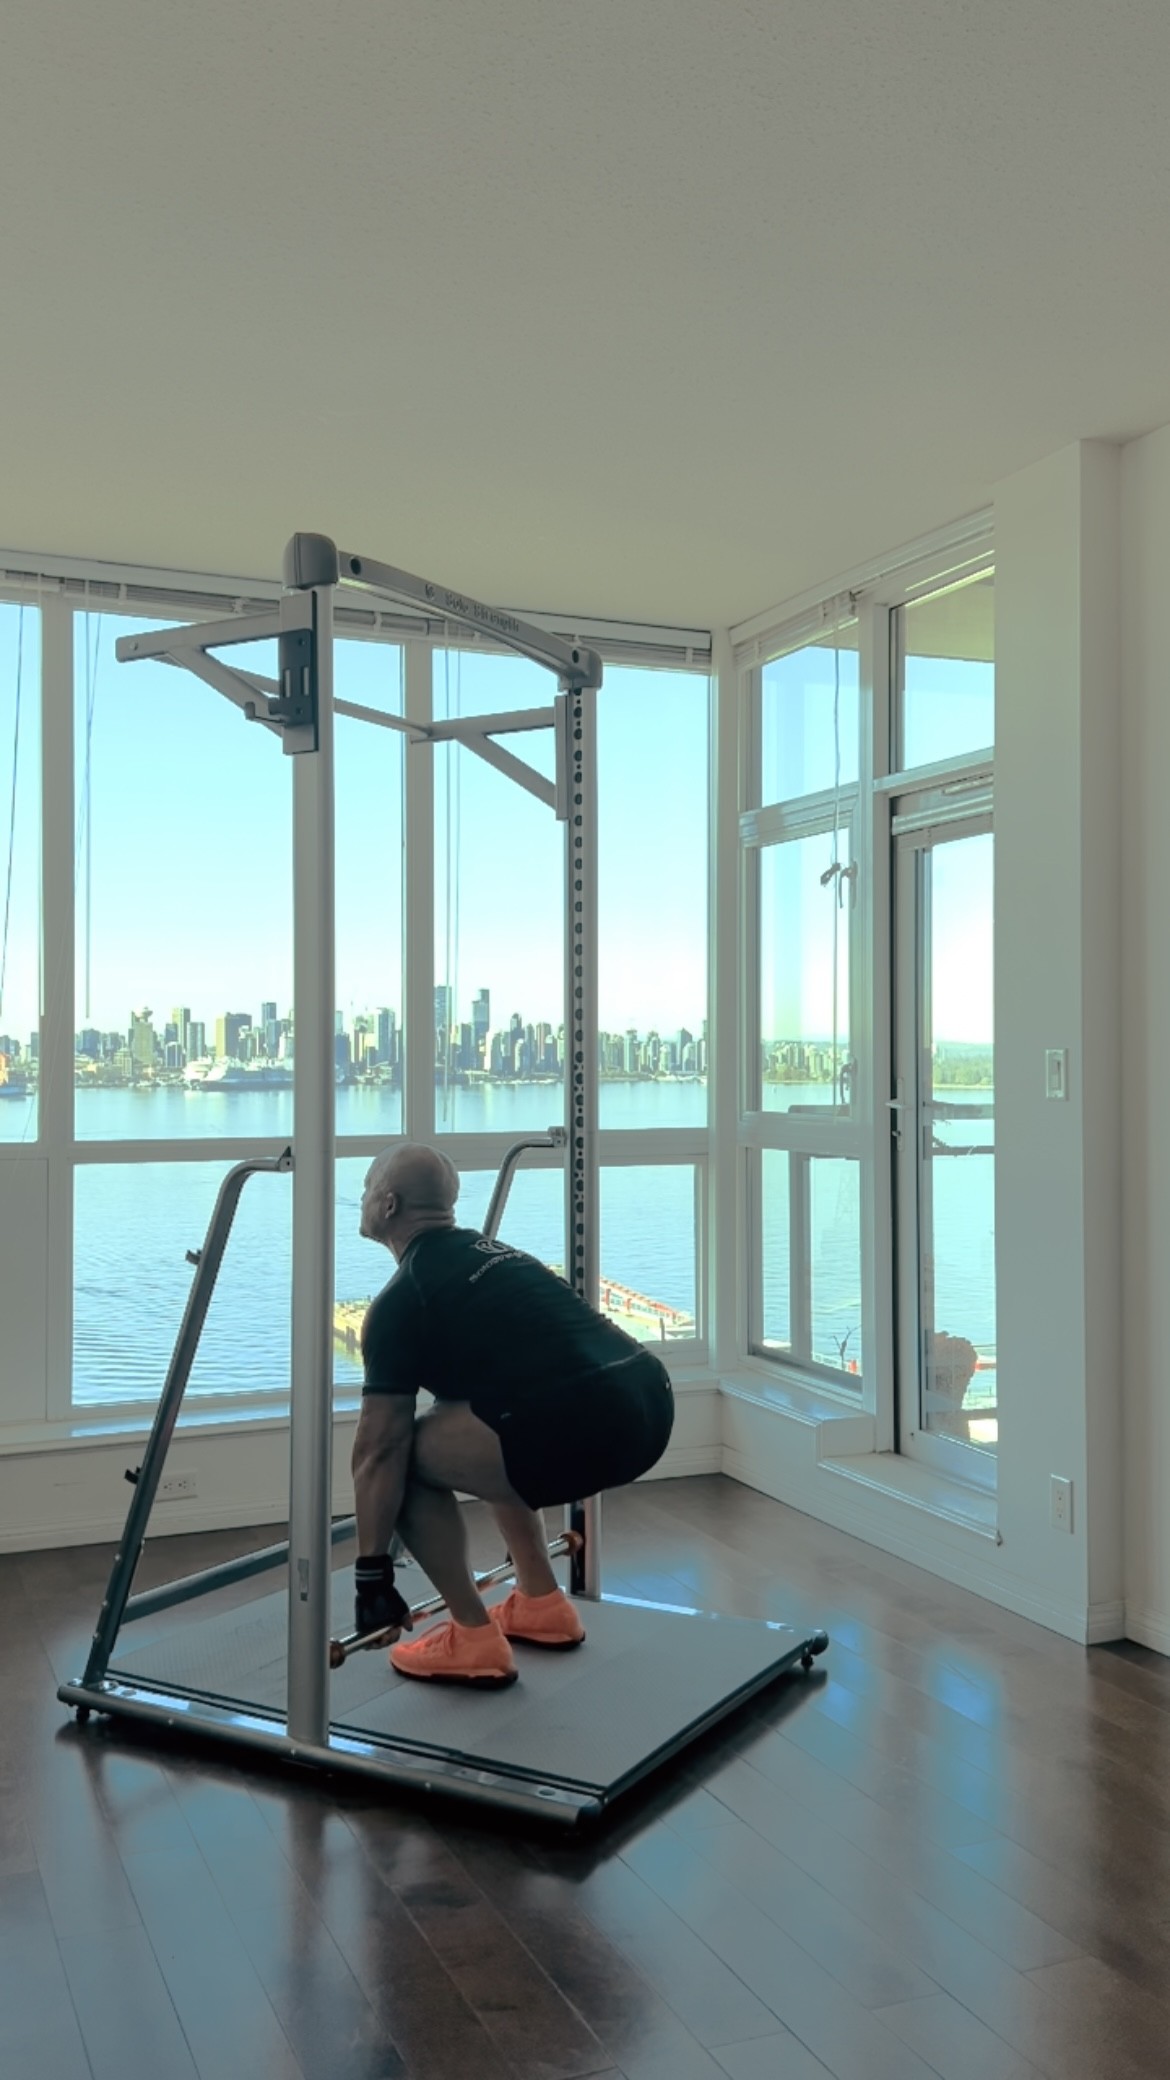
Find a bar to hang, like the SoloStrength Training Station with the bar at max height, so that your legs are straight and your feet are not touching the ground.
While hanging, bring your knees up to your chest.
Hold for one second, then bring them back down.
Alternatively, you can get in position using the Dip Bar Accessory.
Knee ups are great, not only because they work your abs and hip flexors, but because they improve grip strength and shoulder health as you hang.
Hanging Oblique Crunch
How to do them:
Like the previous exercise, hang from your SoloStrength Training Station with the bar at max height.
While hanging, bring your knees up towards your chest on an angle, as if you were aiming for your left shoulder. You should feel your right obliques engaged.
Bring your knees down.
Alternate sides, aiming for your right shoulder. Here, you should feel your left obliques engaged.
Then repeat.
Because the obliques tilt your hips, the oblique opposite to the shoulder you are aiming for will be engaged.
Hanging Oblique Twist
How to do them:
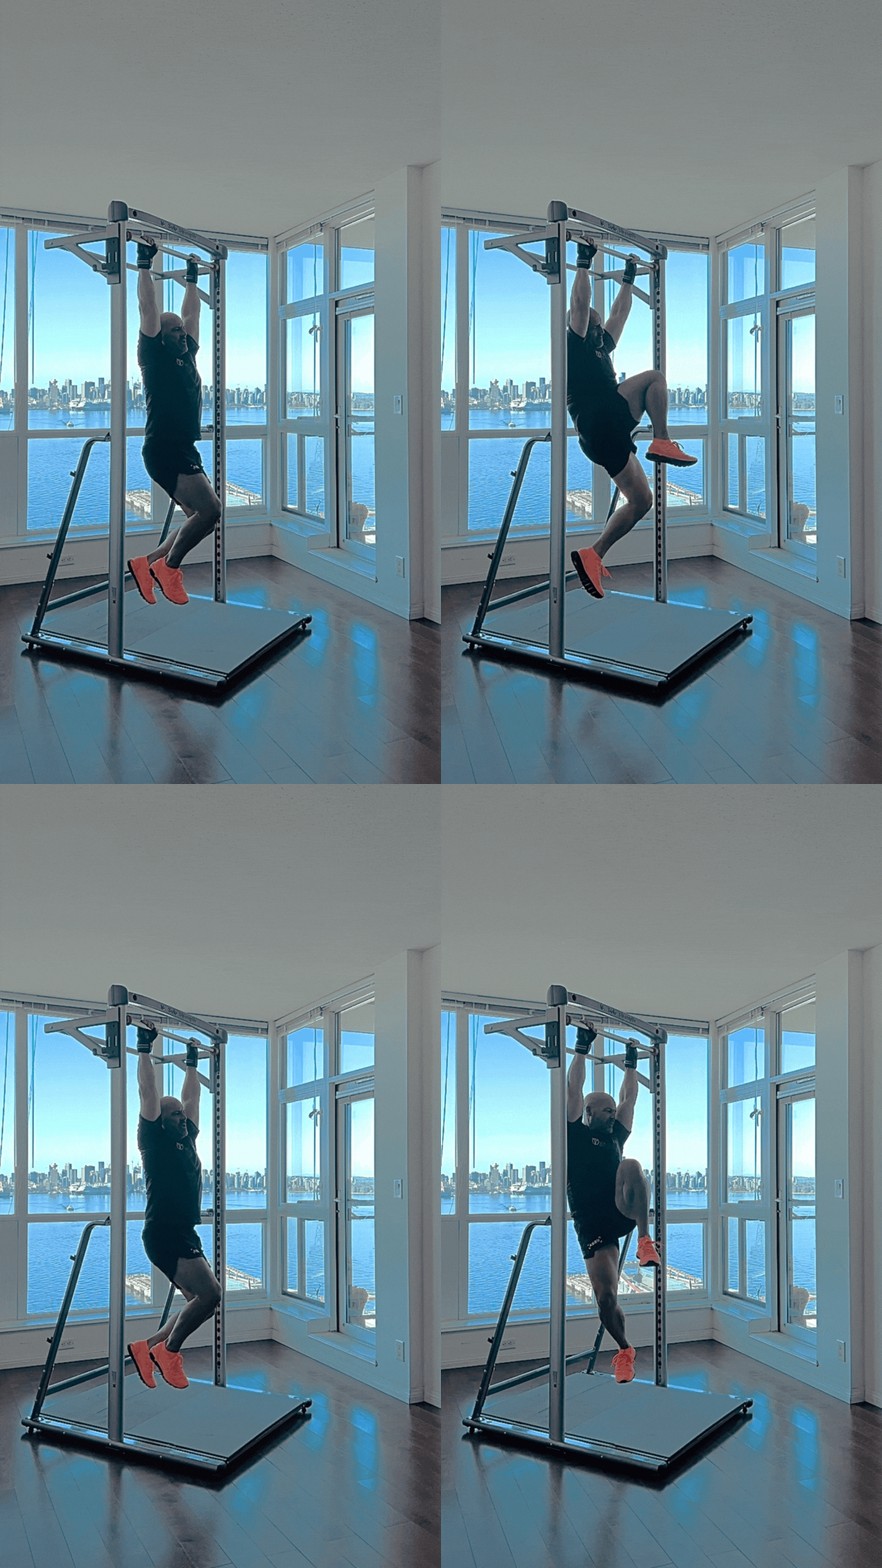
This is a hybrid between the hanging knee up and the oblique crunch, but with only one leg at a time.
Hang from your SoloStrength Training Station with the bar at max height.
Bring your left knee up to your right shoulder while the other leg hangs.
Then lower it and repeat with the right knee up towards your left shoulder, while the other leg hangs.
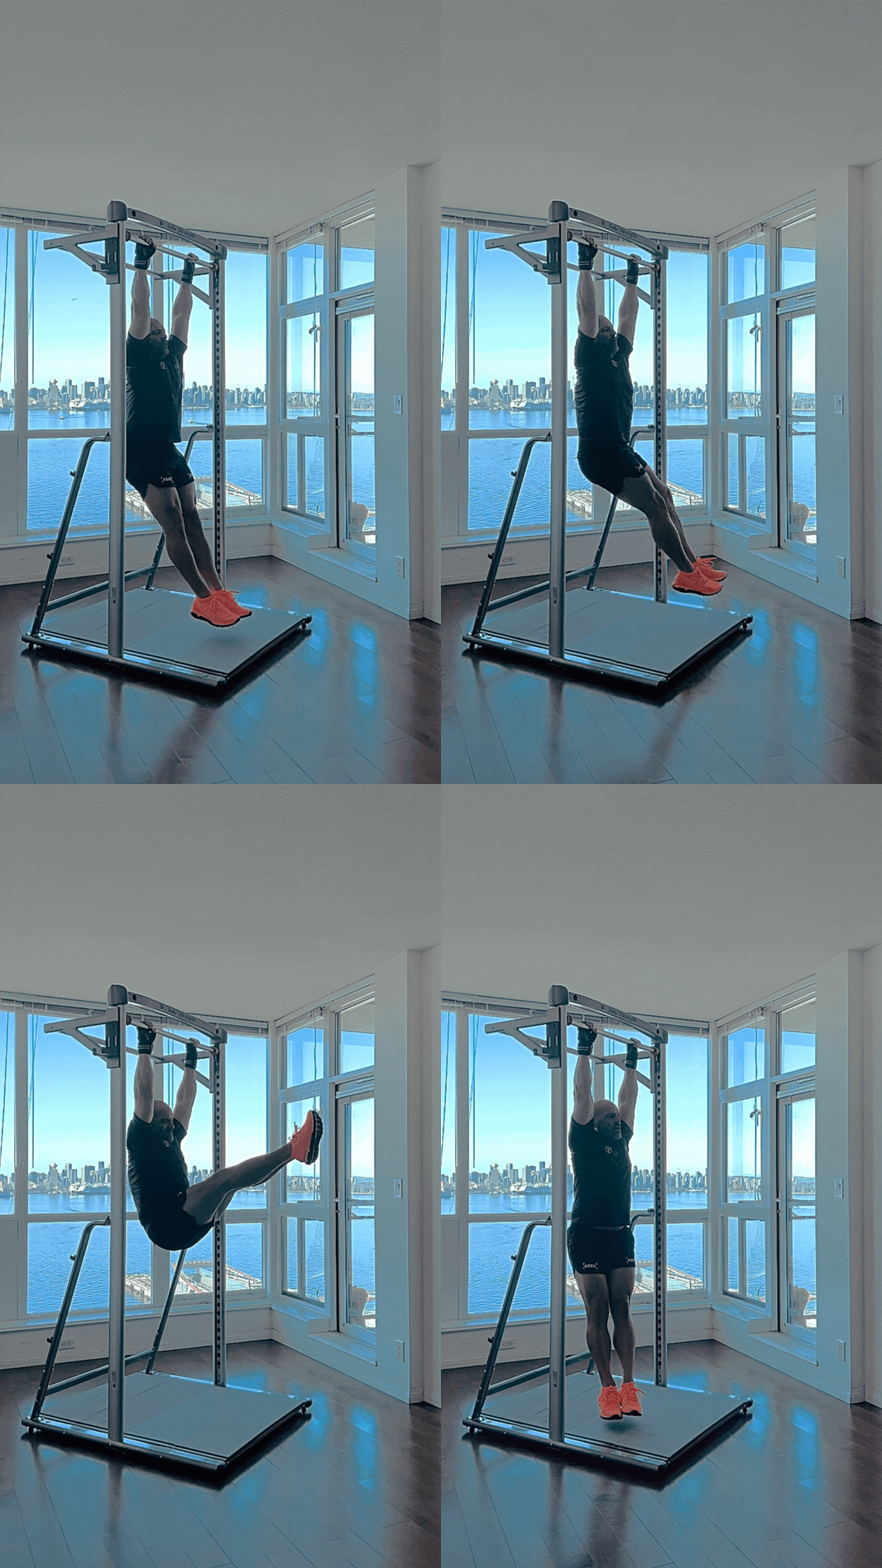
Hanging Leg Lifts
How to do them:
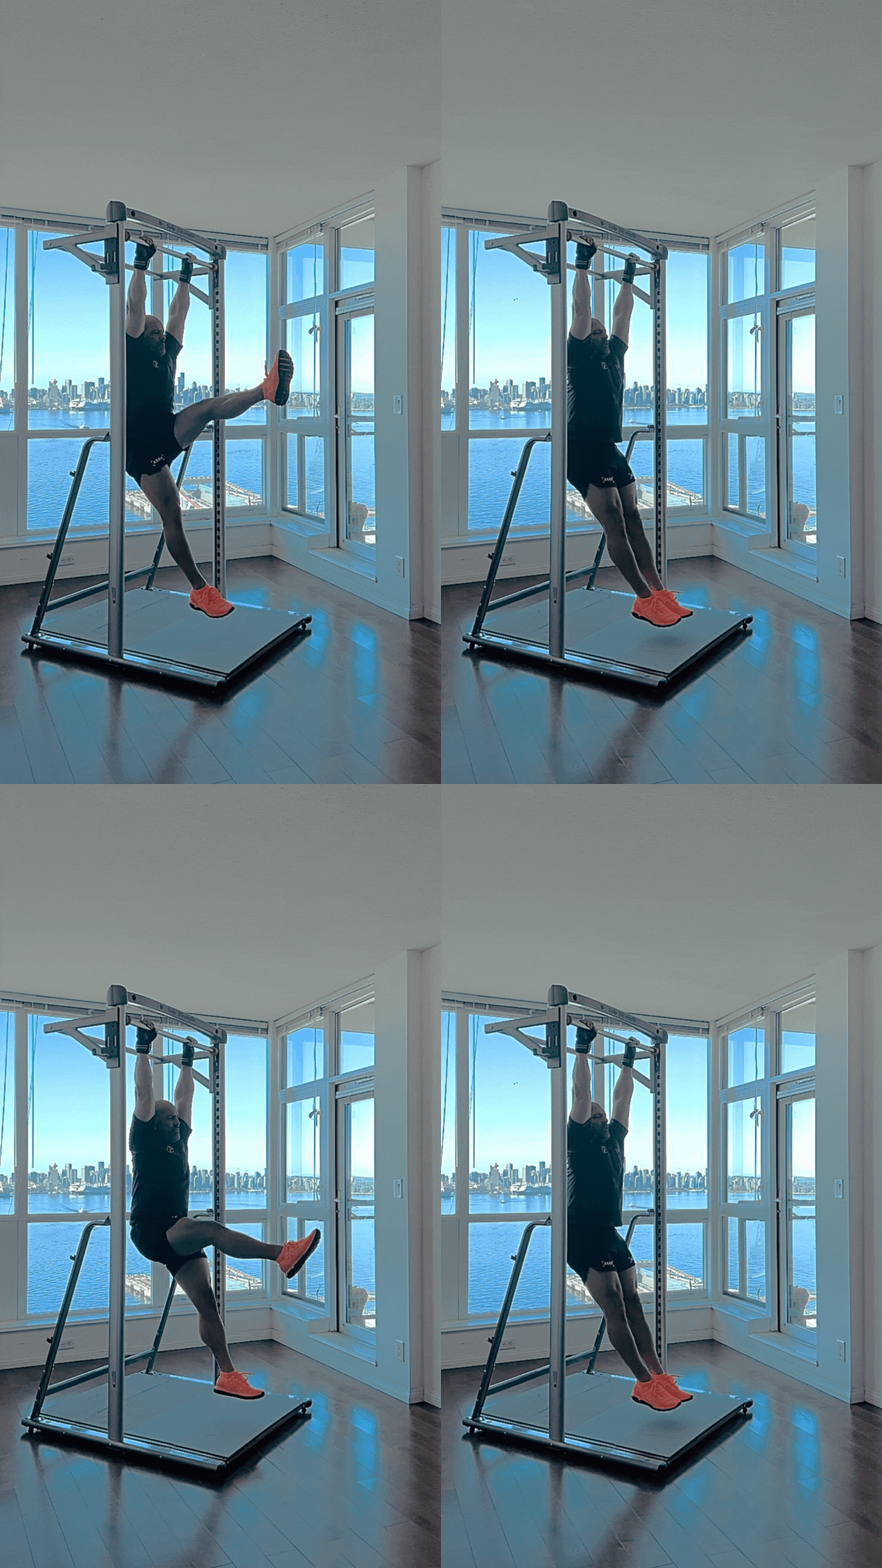
Hang from your SoloStrength Training Station with the bar at max height.
While keeping your legs straight, bring up one leg by bending at the hips.
Relax, bring it back down, and raise the other leg.
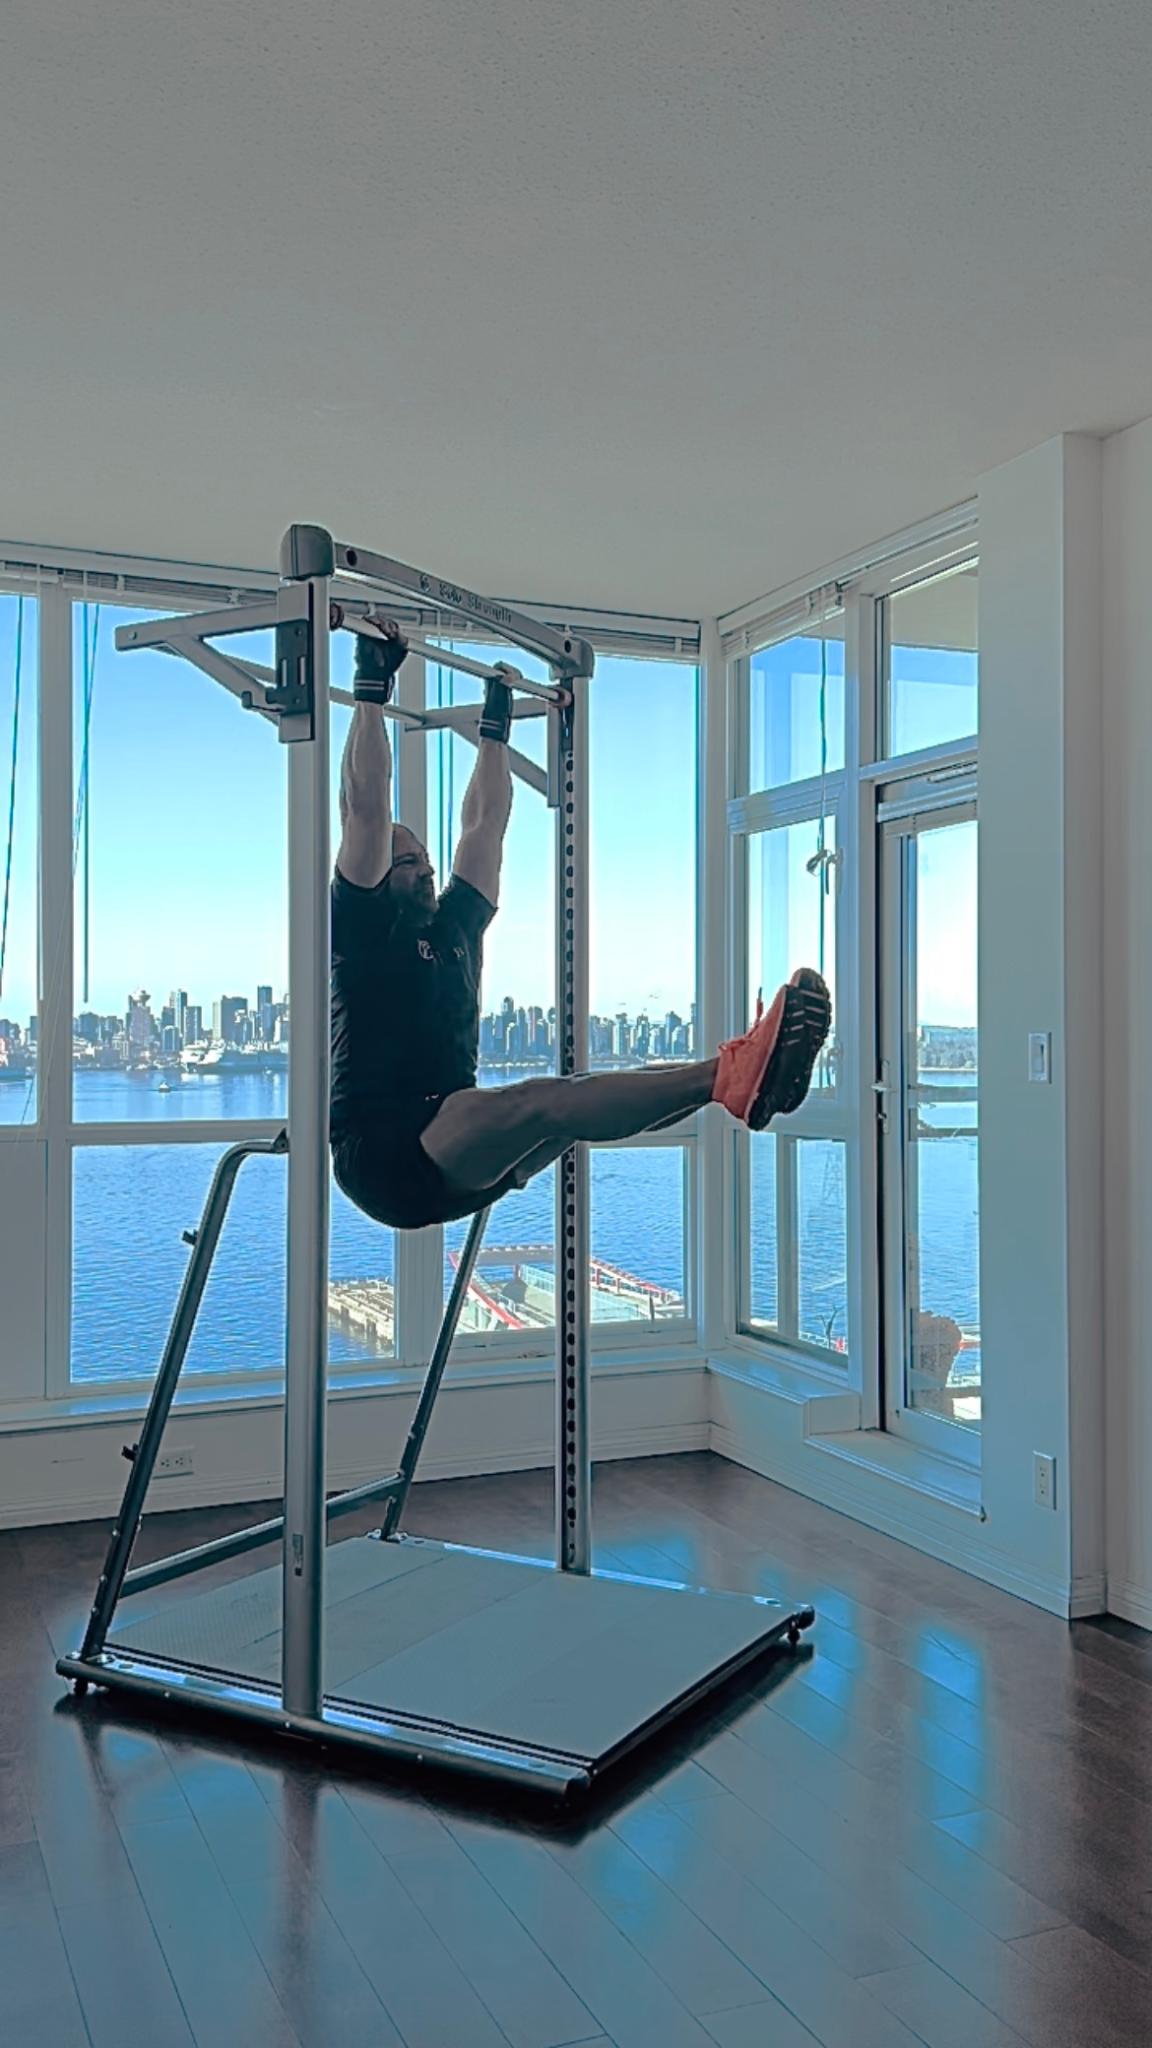
Hanging L Sit
How to do them:
This is similar to the leg lift, but lifting both legs as opposed to just one at a time.
For a more difficult variant, try the Hanging L Sit Hold. If you can, hold for 30 seconds.
Hanging Leg Rotation
How to do them:
Hang from the SoloStrength Training Station at max height.
Bring your feet up and make a circle with them while keeping your knees straight.
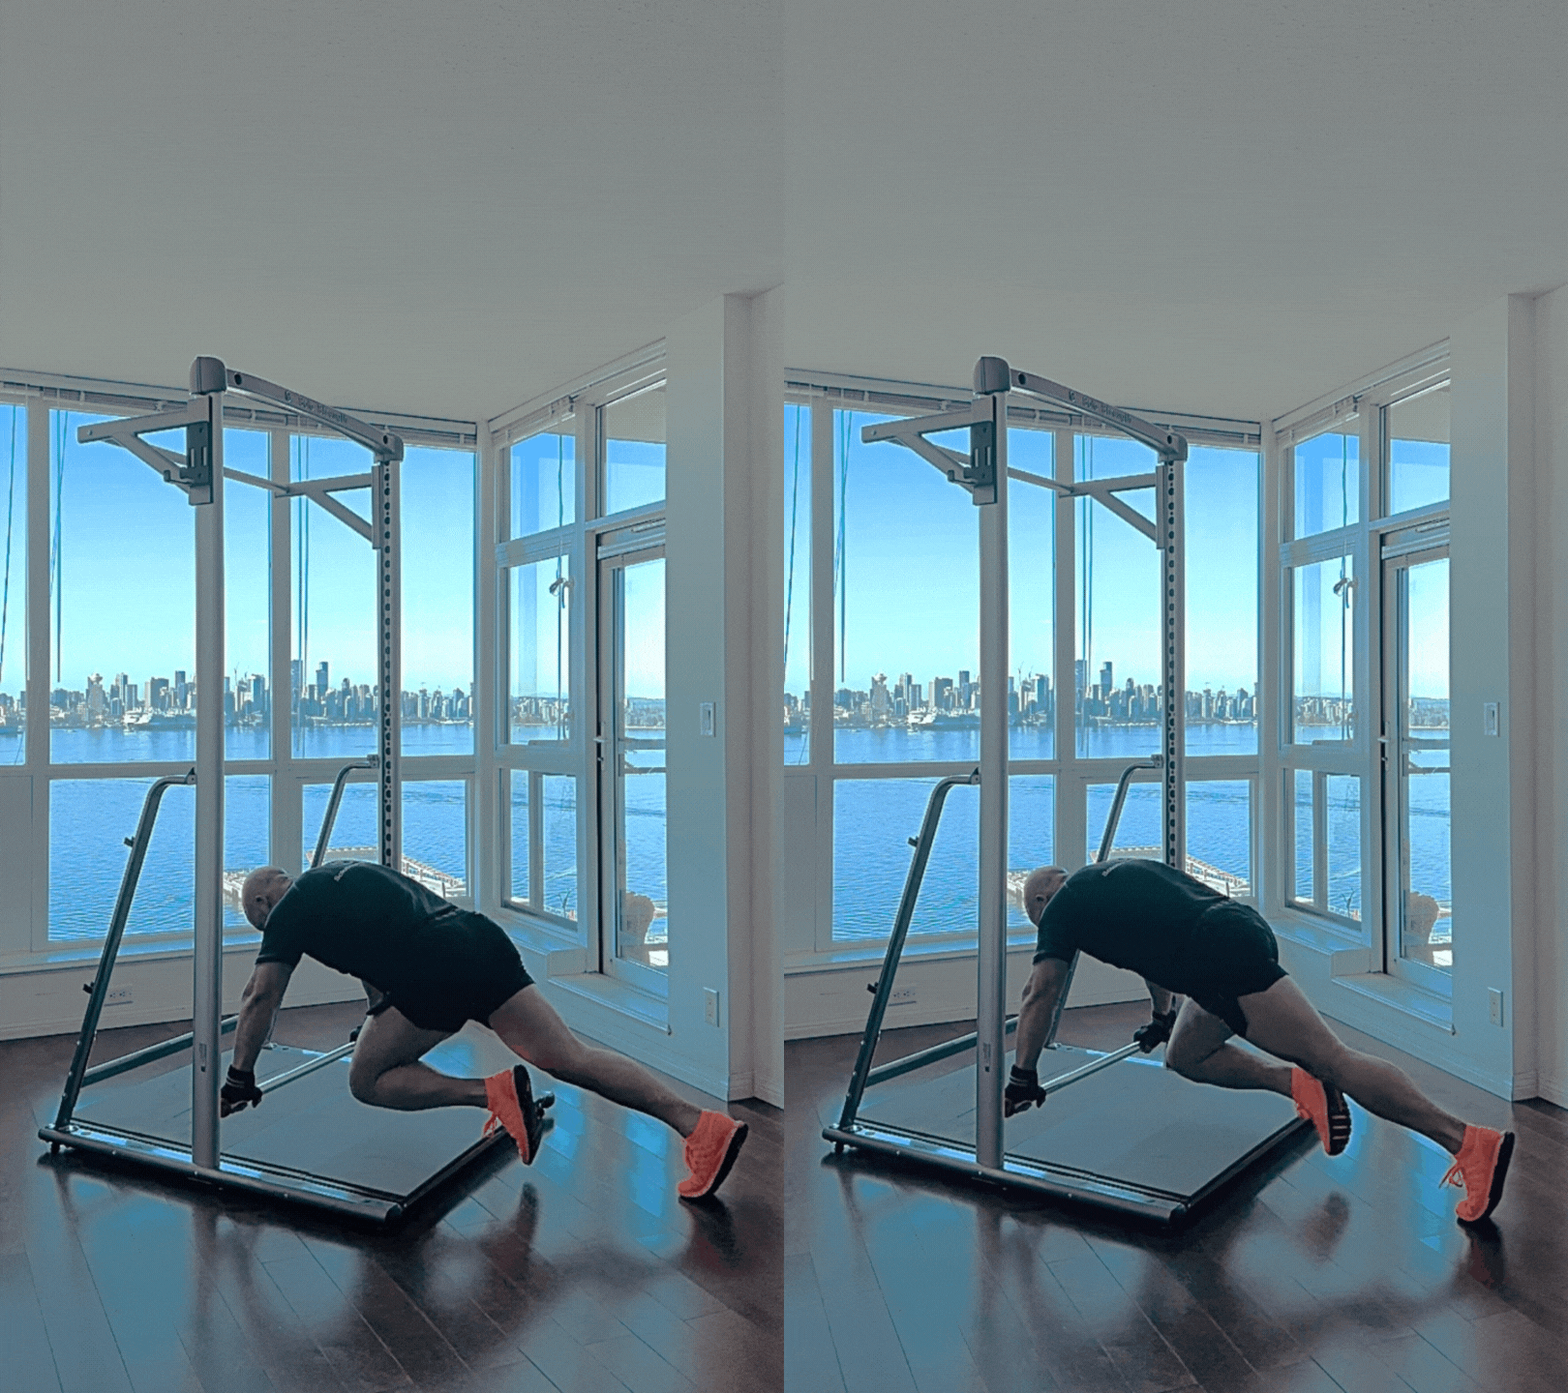
Mountain Climbers
How to do them:
Get in a pushup position, with the SoloStrength Training Station bar set just below the hips.
Bring your left knee up to your chest, or as close as you can get, while your weight rests on your right foot.
Bring your left foot back down and repeat the process with the right knee.
For a more difficult variant, set the bar to its lowest position.
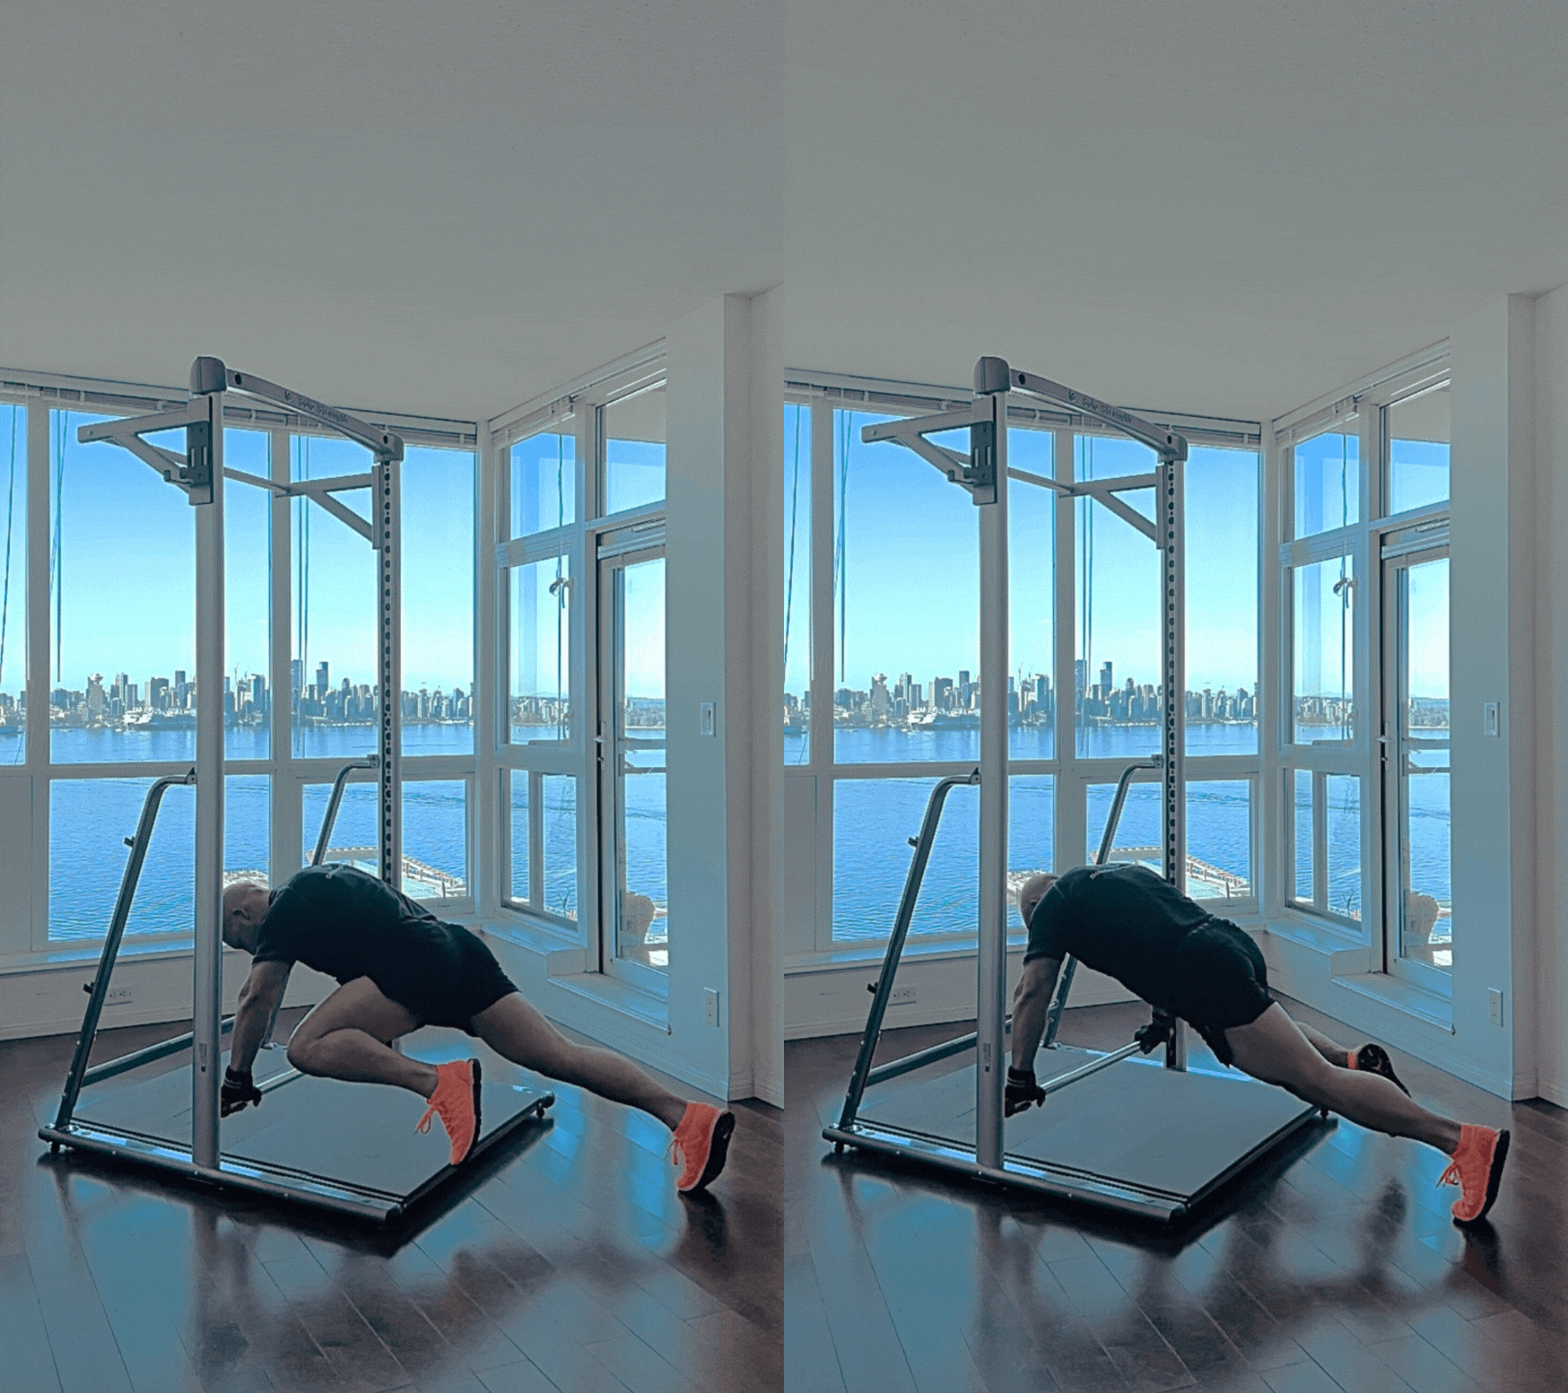
Mountain Climbers to Elbow
How to do them:
Similar to the mountain climbers but instead of bringing your knee to your chest, bring it to your elbow on the same side.
If that is too easy for you, lower the bar all the way so you are almost horizontal.
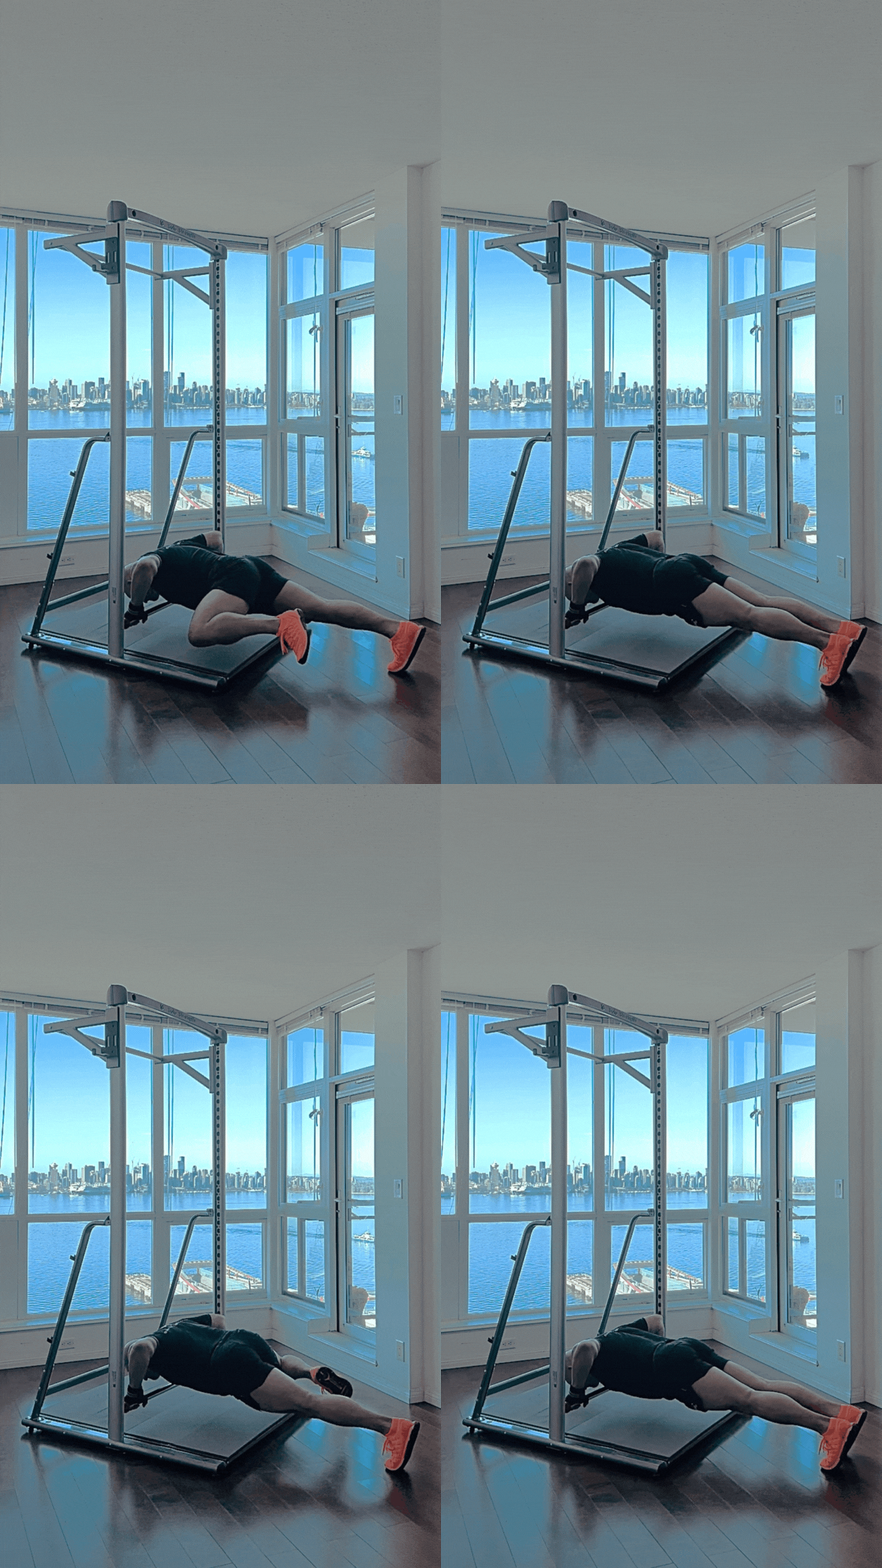
Spidey’s
How to do them:
Set the bar on the SoloStrength Training Station on its lowest setting and get in a pushup position.
Lower your chest close to the bar and hold this position.
Bring one knee up toward your elbow on the same side without raising your body.
Bring it back down and repeat with the other leg.
Tips
Don’t just focus on reps; focus on quality contractions. Your goal isn’t to move your body in the motion of the exercise, but to use your abs to pull your body in position. The difference is in how strongly developed the mind-muscle connection is.
Be consistent. Although you can see improvements in between workouts, the majority of improvements come from doing the same thing for an extended, and consistent, period of time.
Change it up. You can’t do the same thing forever expecting results. Once you stop seeing progress with an exercise, change it up with something new. It may take 2-3 months of consistency before you begin to see a plateau.
Target different areas of the abs. Crunches are great but work mainly the upper abs. Throw in some exercises to cover the lower abs and obliques as well.
Pay attention to your body. As you get stronger, your mind-muscle connection will improve. You will notice some exercises are harder than others. This clue points to which muscle groups are weak. Use this to guide your choice of exercises.
What’s Next?
Now that we’ve covered the legs and abs, the upper body is next. Starting with the Back, we will cover exercises to help you get the width of that V taper.
View more SoloStrength SpeedFit® Training Here.
Or navigate to other articles in this series:
Posted: February 15, 2023
Exclusive for SoloStrength Lifestyle Products.
More and more with SoloStrength...
Choose Your Perfect Ultimate Strength And Stretching Training Station:
#1 Bodyweight Home Gym Workout Systems
NEW Adjustable Pull Up Bar
Calisthenics Workouts
Isometrics Equipment
Bodyweight Exercise Equipment

SoloStrength Adjustable Height Bar Changes Everything
✓ 3 Second Bar Height Changes
✓ No Setup Time To Start Your Workout
✓ Full Body Satisfying Workouts
✓ You Just Feel Awesome Every Workout
✓ Calisthenics, Stretching, Isometrics
✓ Circuits, Cardio Functional, Strength
✓ Get FIT Faster. Stay FIT Forever 💪
Welcome! Take this opportunity now to SIGN UP FOR MORE!
You can join over 50,000 subscribers worldwide and 1000s of customers who are taking control of their fitness and getting more from their workouts with SoloStrength® training systems!
